
Table of Contents
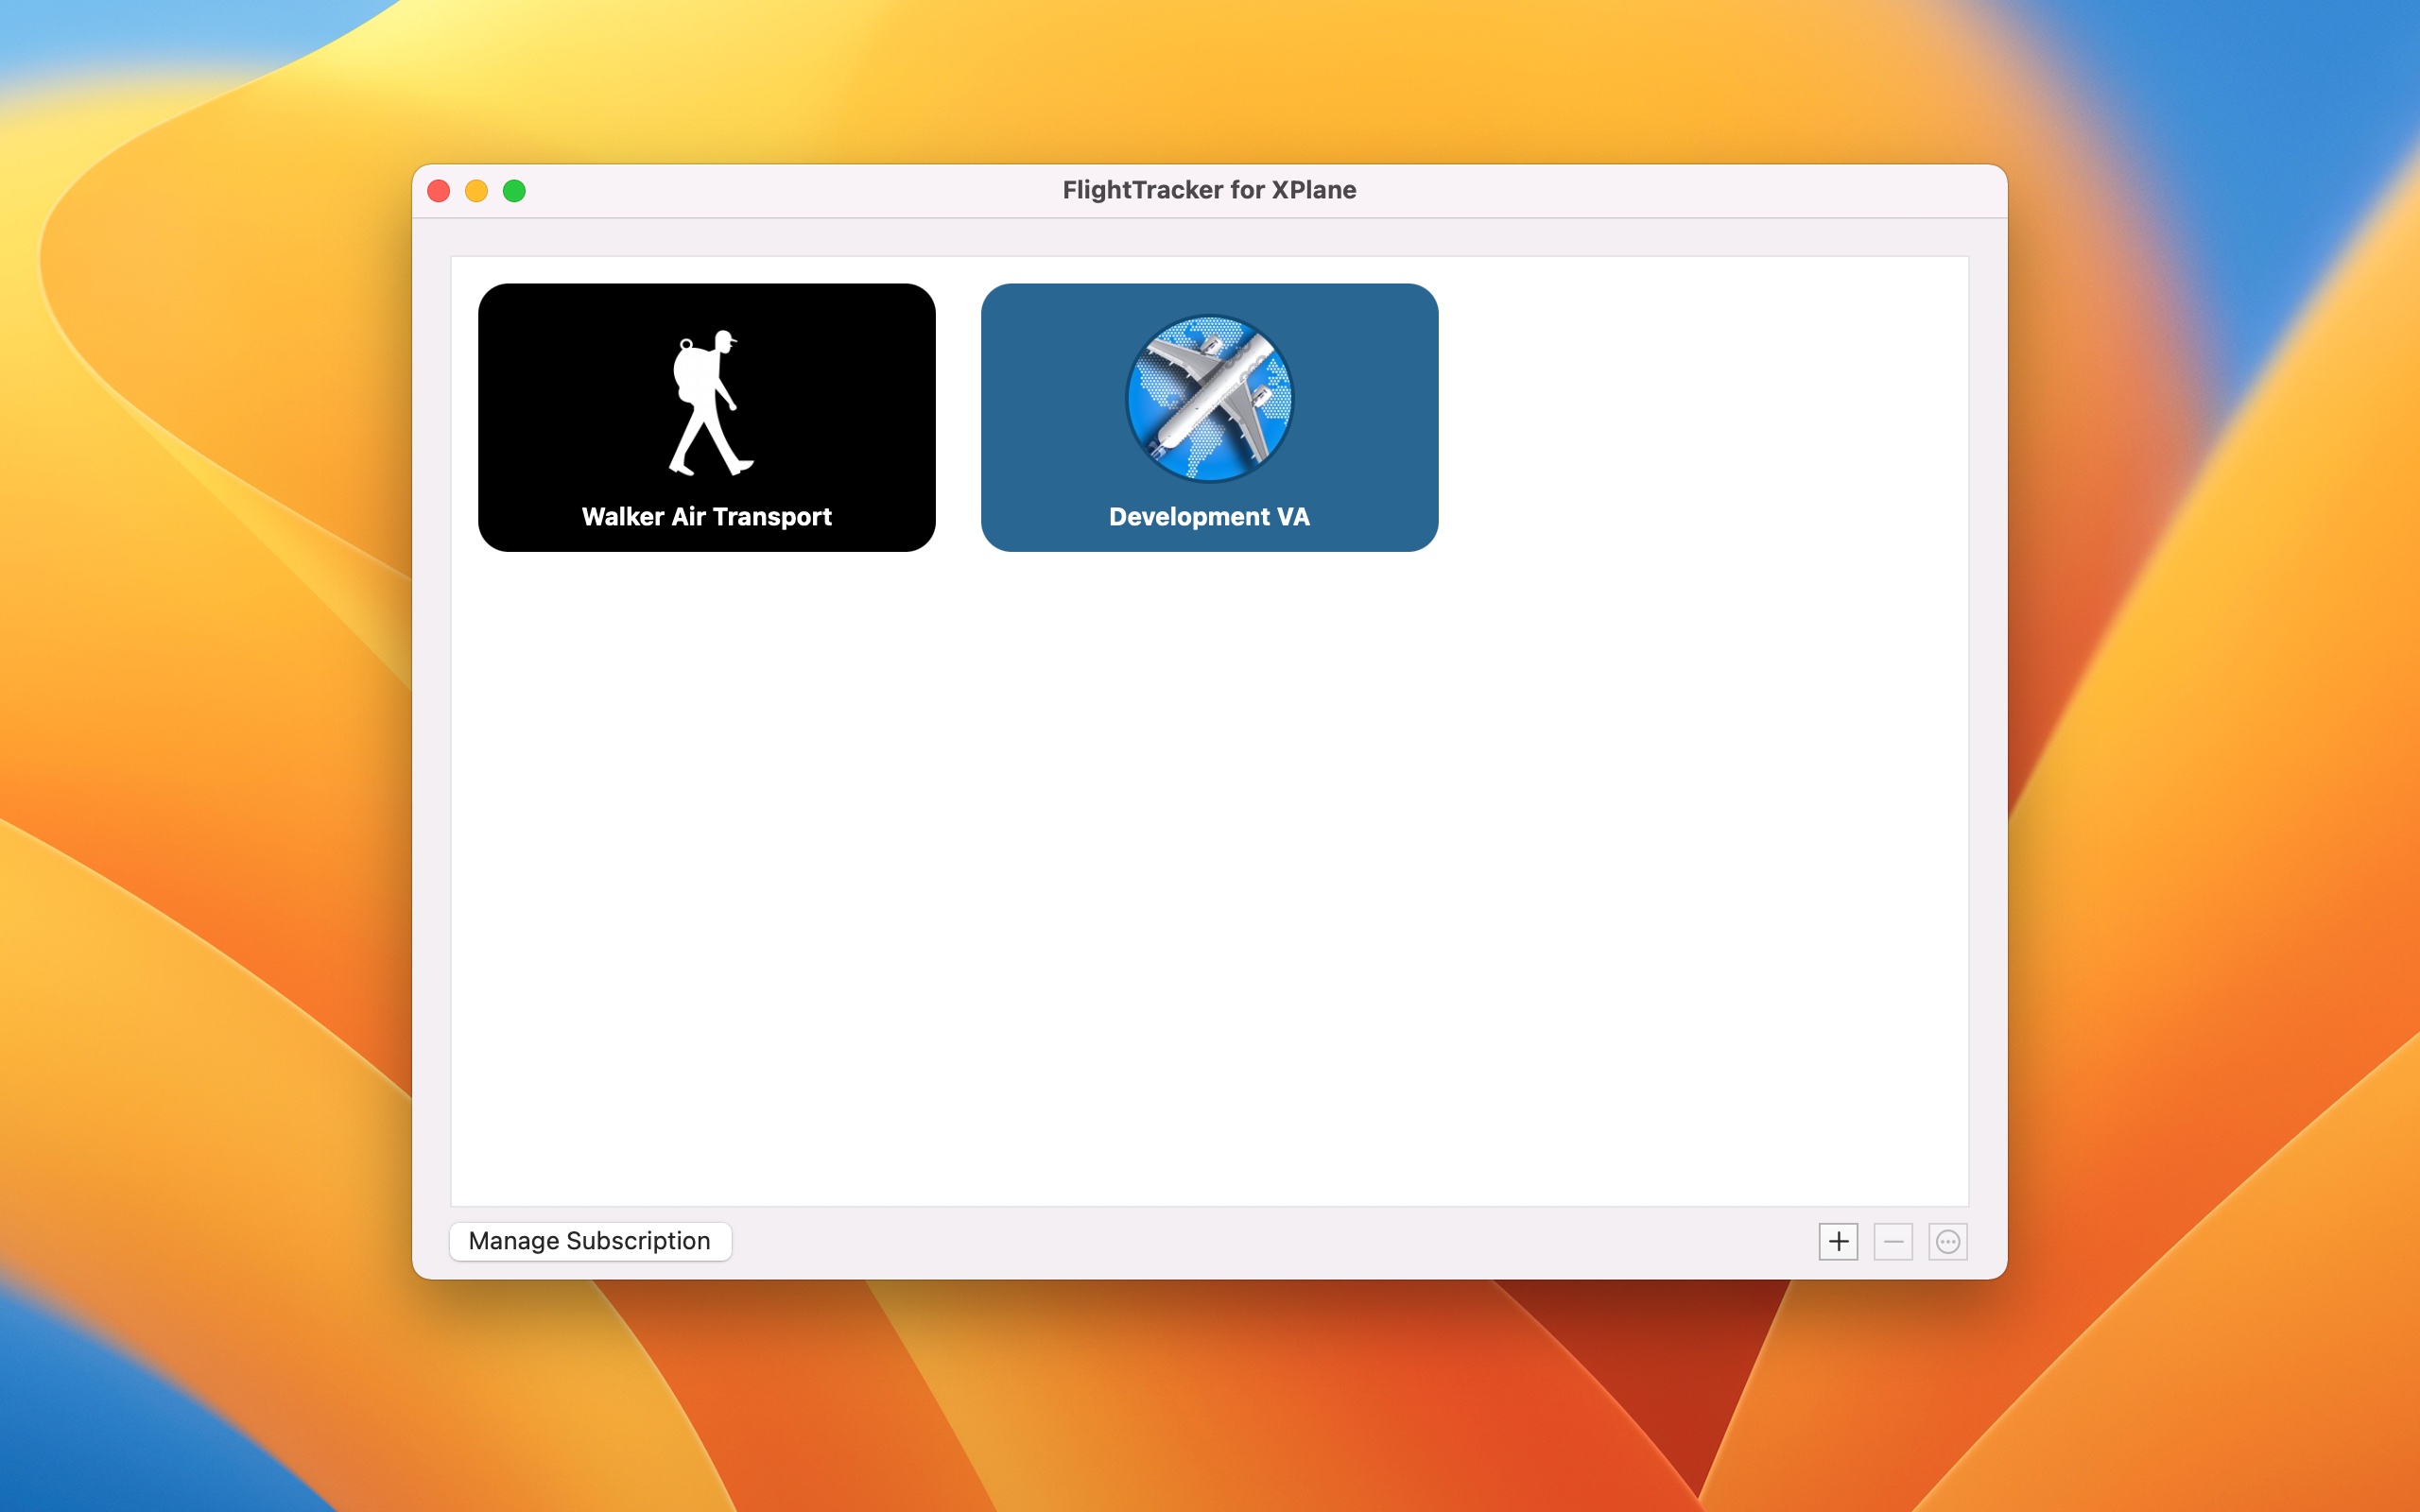
Airline Selection Screen (Main Window)
After starting the program you will see the airline selection screen. If you start the program for the first time, it will be empty. At the bottom left you will find the option to subscribe or manage your subscription. At the bottom right you have the possibility to add, delete or edit an airline configuration. Double-click on an airline icon to perform a flight for it.
Airline Configuration Window
Before you can make your first flight, you need to configure your virtual airline. If you haven’t started your virtual pilot career in any virtual airline yet, you can see suggestions on the left side. With a simple click on the icon you take over the configuration parameters of this VA and you only have to enter the username and password. Of course you can still enter all information manually, just select the top icon with the name “Create from scratch”.
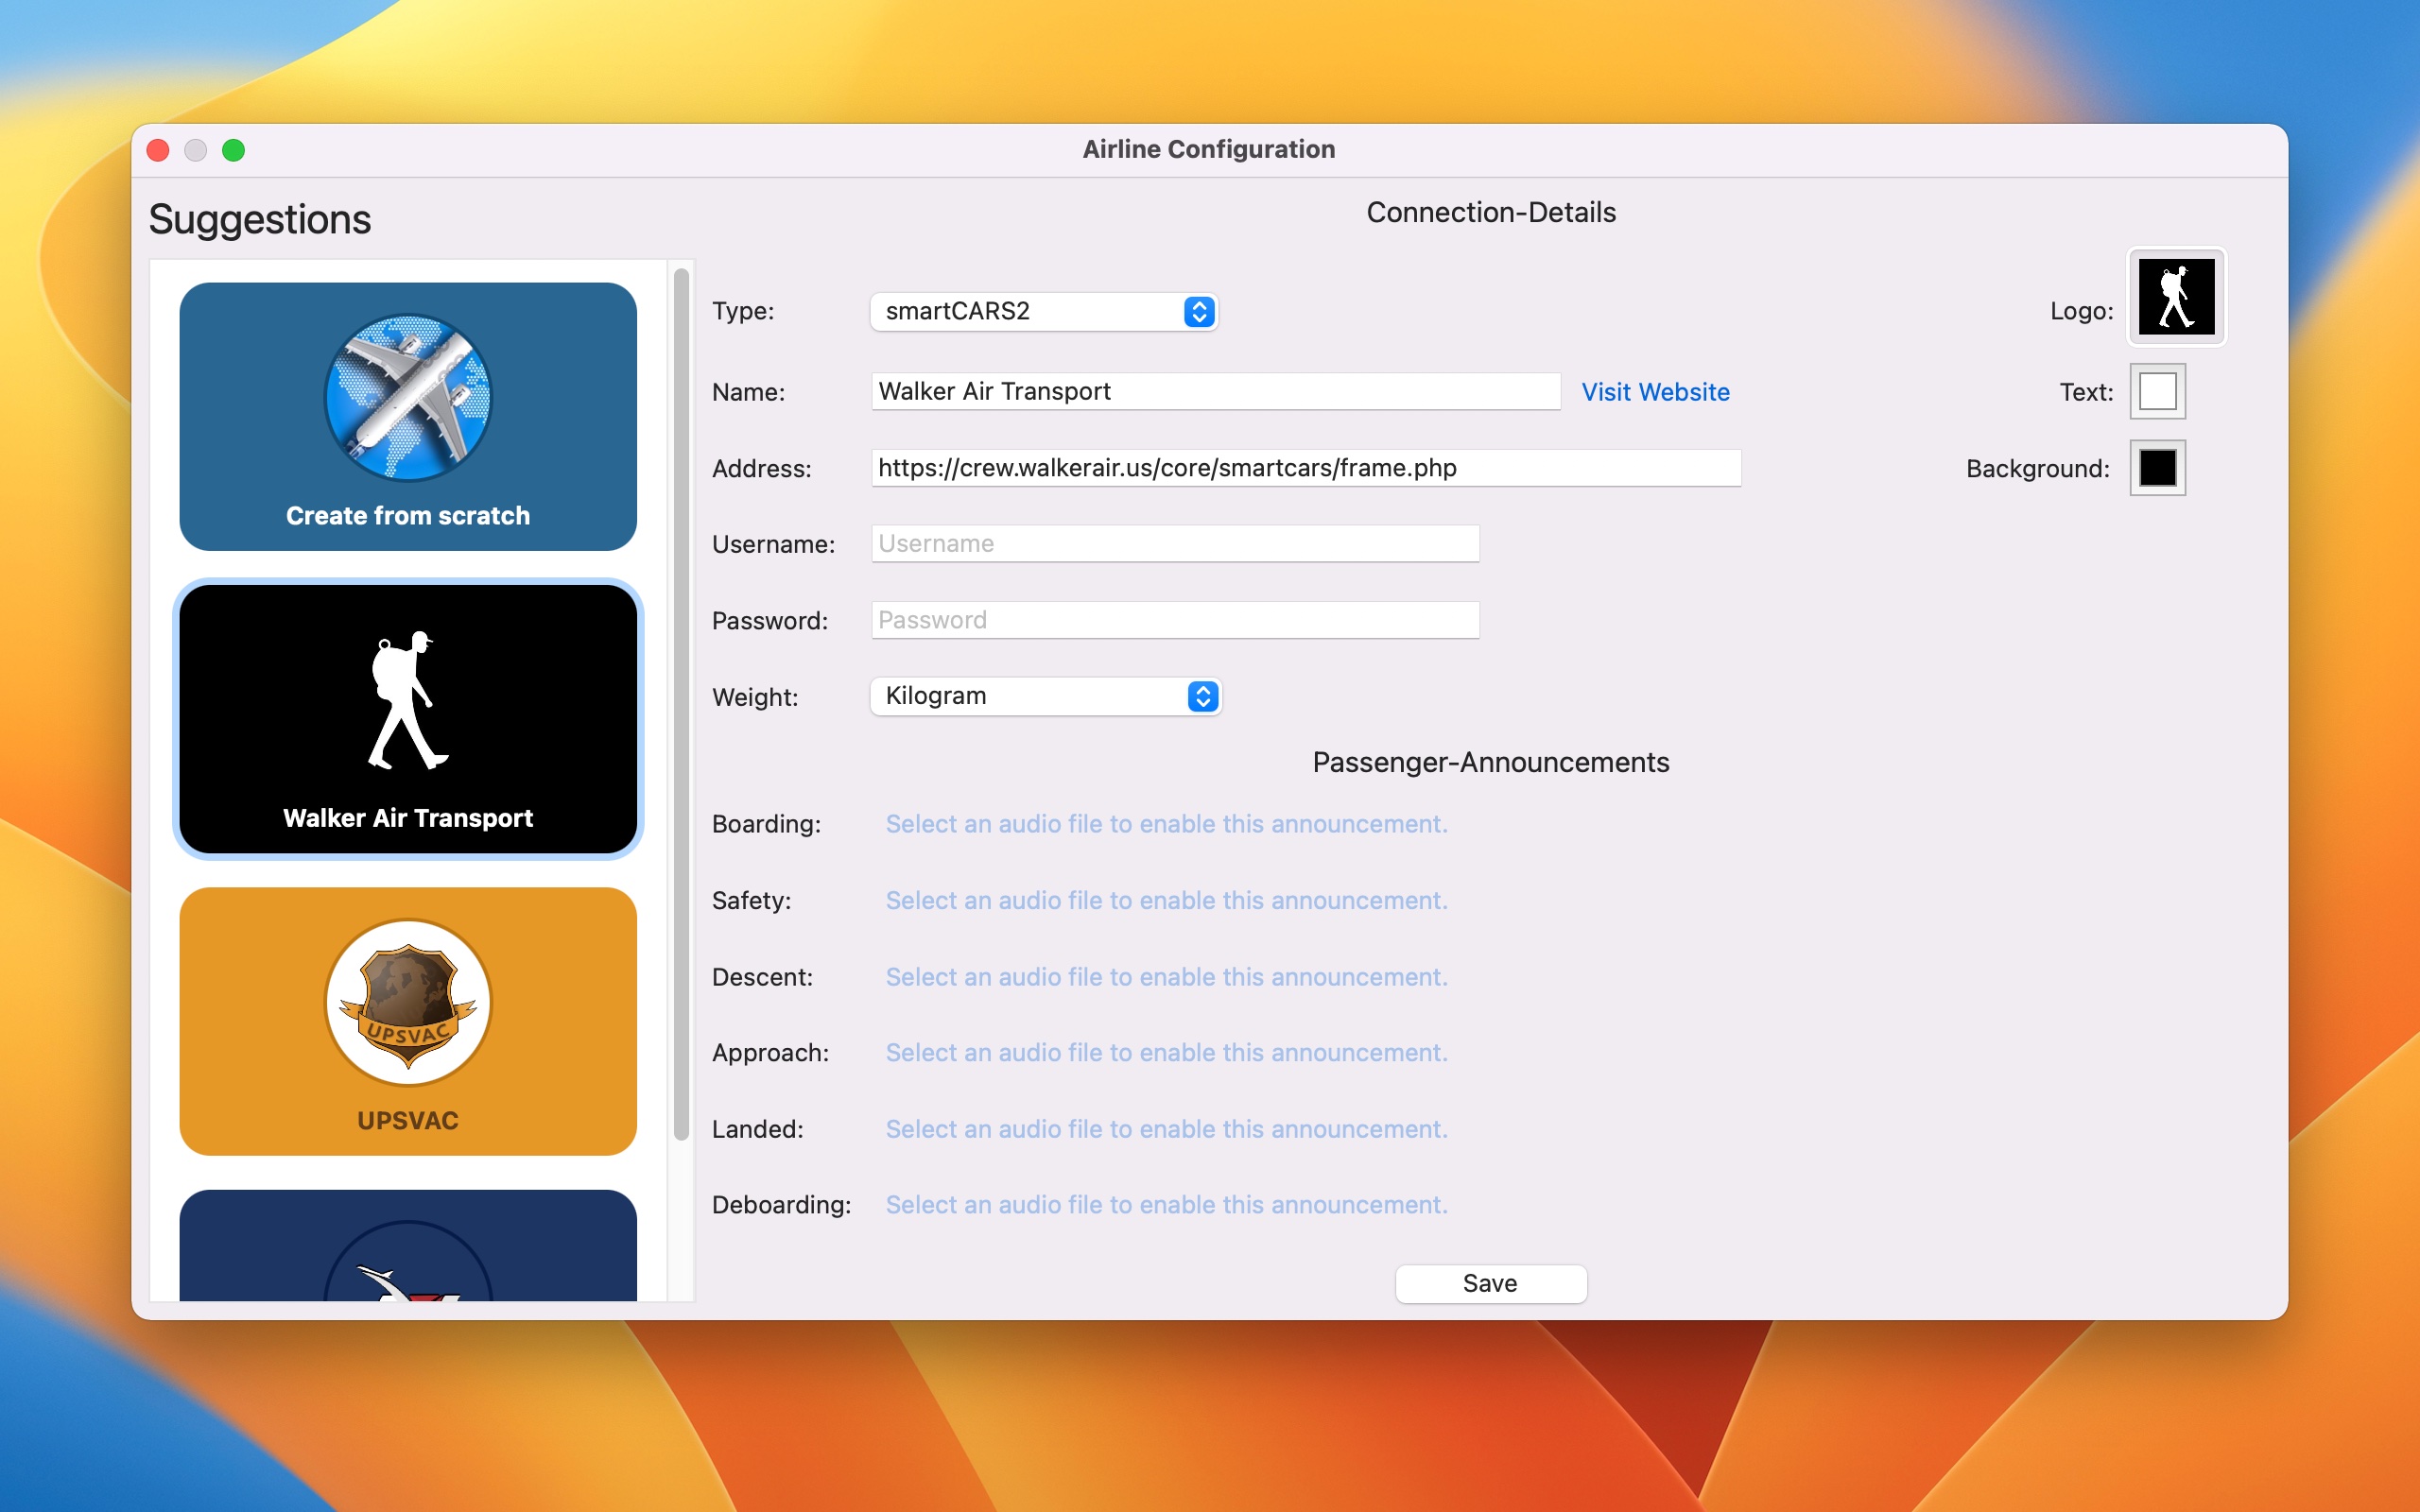
No matter which airline you choose, the following information will be required. If you need help with the setup, please contact a representative in the virtual airline.
| Field | Description |
|---|---|
| Type | This protocol is used to transfer data to the airline. |
| Name | The name of the virtual airline. |
| Adress | The full URL to the interface of the selected protocol. |
| Username | Username set during registration on their site. |
| Password | Password defined during registration on their site. |
| Weight | The unit of measurement for weights. |
| Text-Color | Text color used for the icon display. |
| Background-Color | The background color for the icon display. |
| Image | The logo of the virtual airline. |
Your first flight
Preparations
Flight booking cannot be done through the program. For this, visit the website of your virtual airline to make a booking. Follow the flight booking instructions of the airline you want to book a flight for.
After you have made a flight booking, double-click on the corresponding airline icon in the Airline Selection Window.
Pilotcenterdata

After that the Pilotcenter-Data window is displayed. Here you will see general information about your virtual pilot career with this airline.
Bookings
Select the “Bookings” view from the menu bar in the upper right corner. If everything went well with the flight booking, you will now find the flight you booked in the “Preparations”-Step in this list.

Since each airline has its own regulations and procedures, not all fields may be pre-filled or some values may not be able to be changed. In any case, you should check if the cruising altitude and the route are filled in correctly. If this is not the case, you have to correct them in the program right now.
Start Tracking
Before you start tracking your flight, the following conditions must be met in X-Plane:
- X-Plane is running and not in pause mode.
- You’ve loaded the right plane for this flight.
- You’re parking at a gate or parking position on the departure airport of the booked flight.
- All engines are off.
- The parking brake is set.
Everything checked, then you are ready to click on the “Start Tracking” button. As with finishing a flight, a green icon indicates which condition is fulfilled or not fulfilled when starting a flight. Once all requirements have been met and the connection with X-Plane has been successfully established, the current flight phase will be displayed.
Perform your flight
You can now focus on your flight in X-Plane. In the background, all detected events will be transmitted to your virtual airline in form of a PIREP at the end of the flight. During the flight, position reports are sent to show the status of your flight on a live map, if your airline offers something like this.
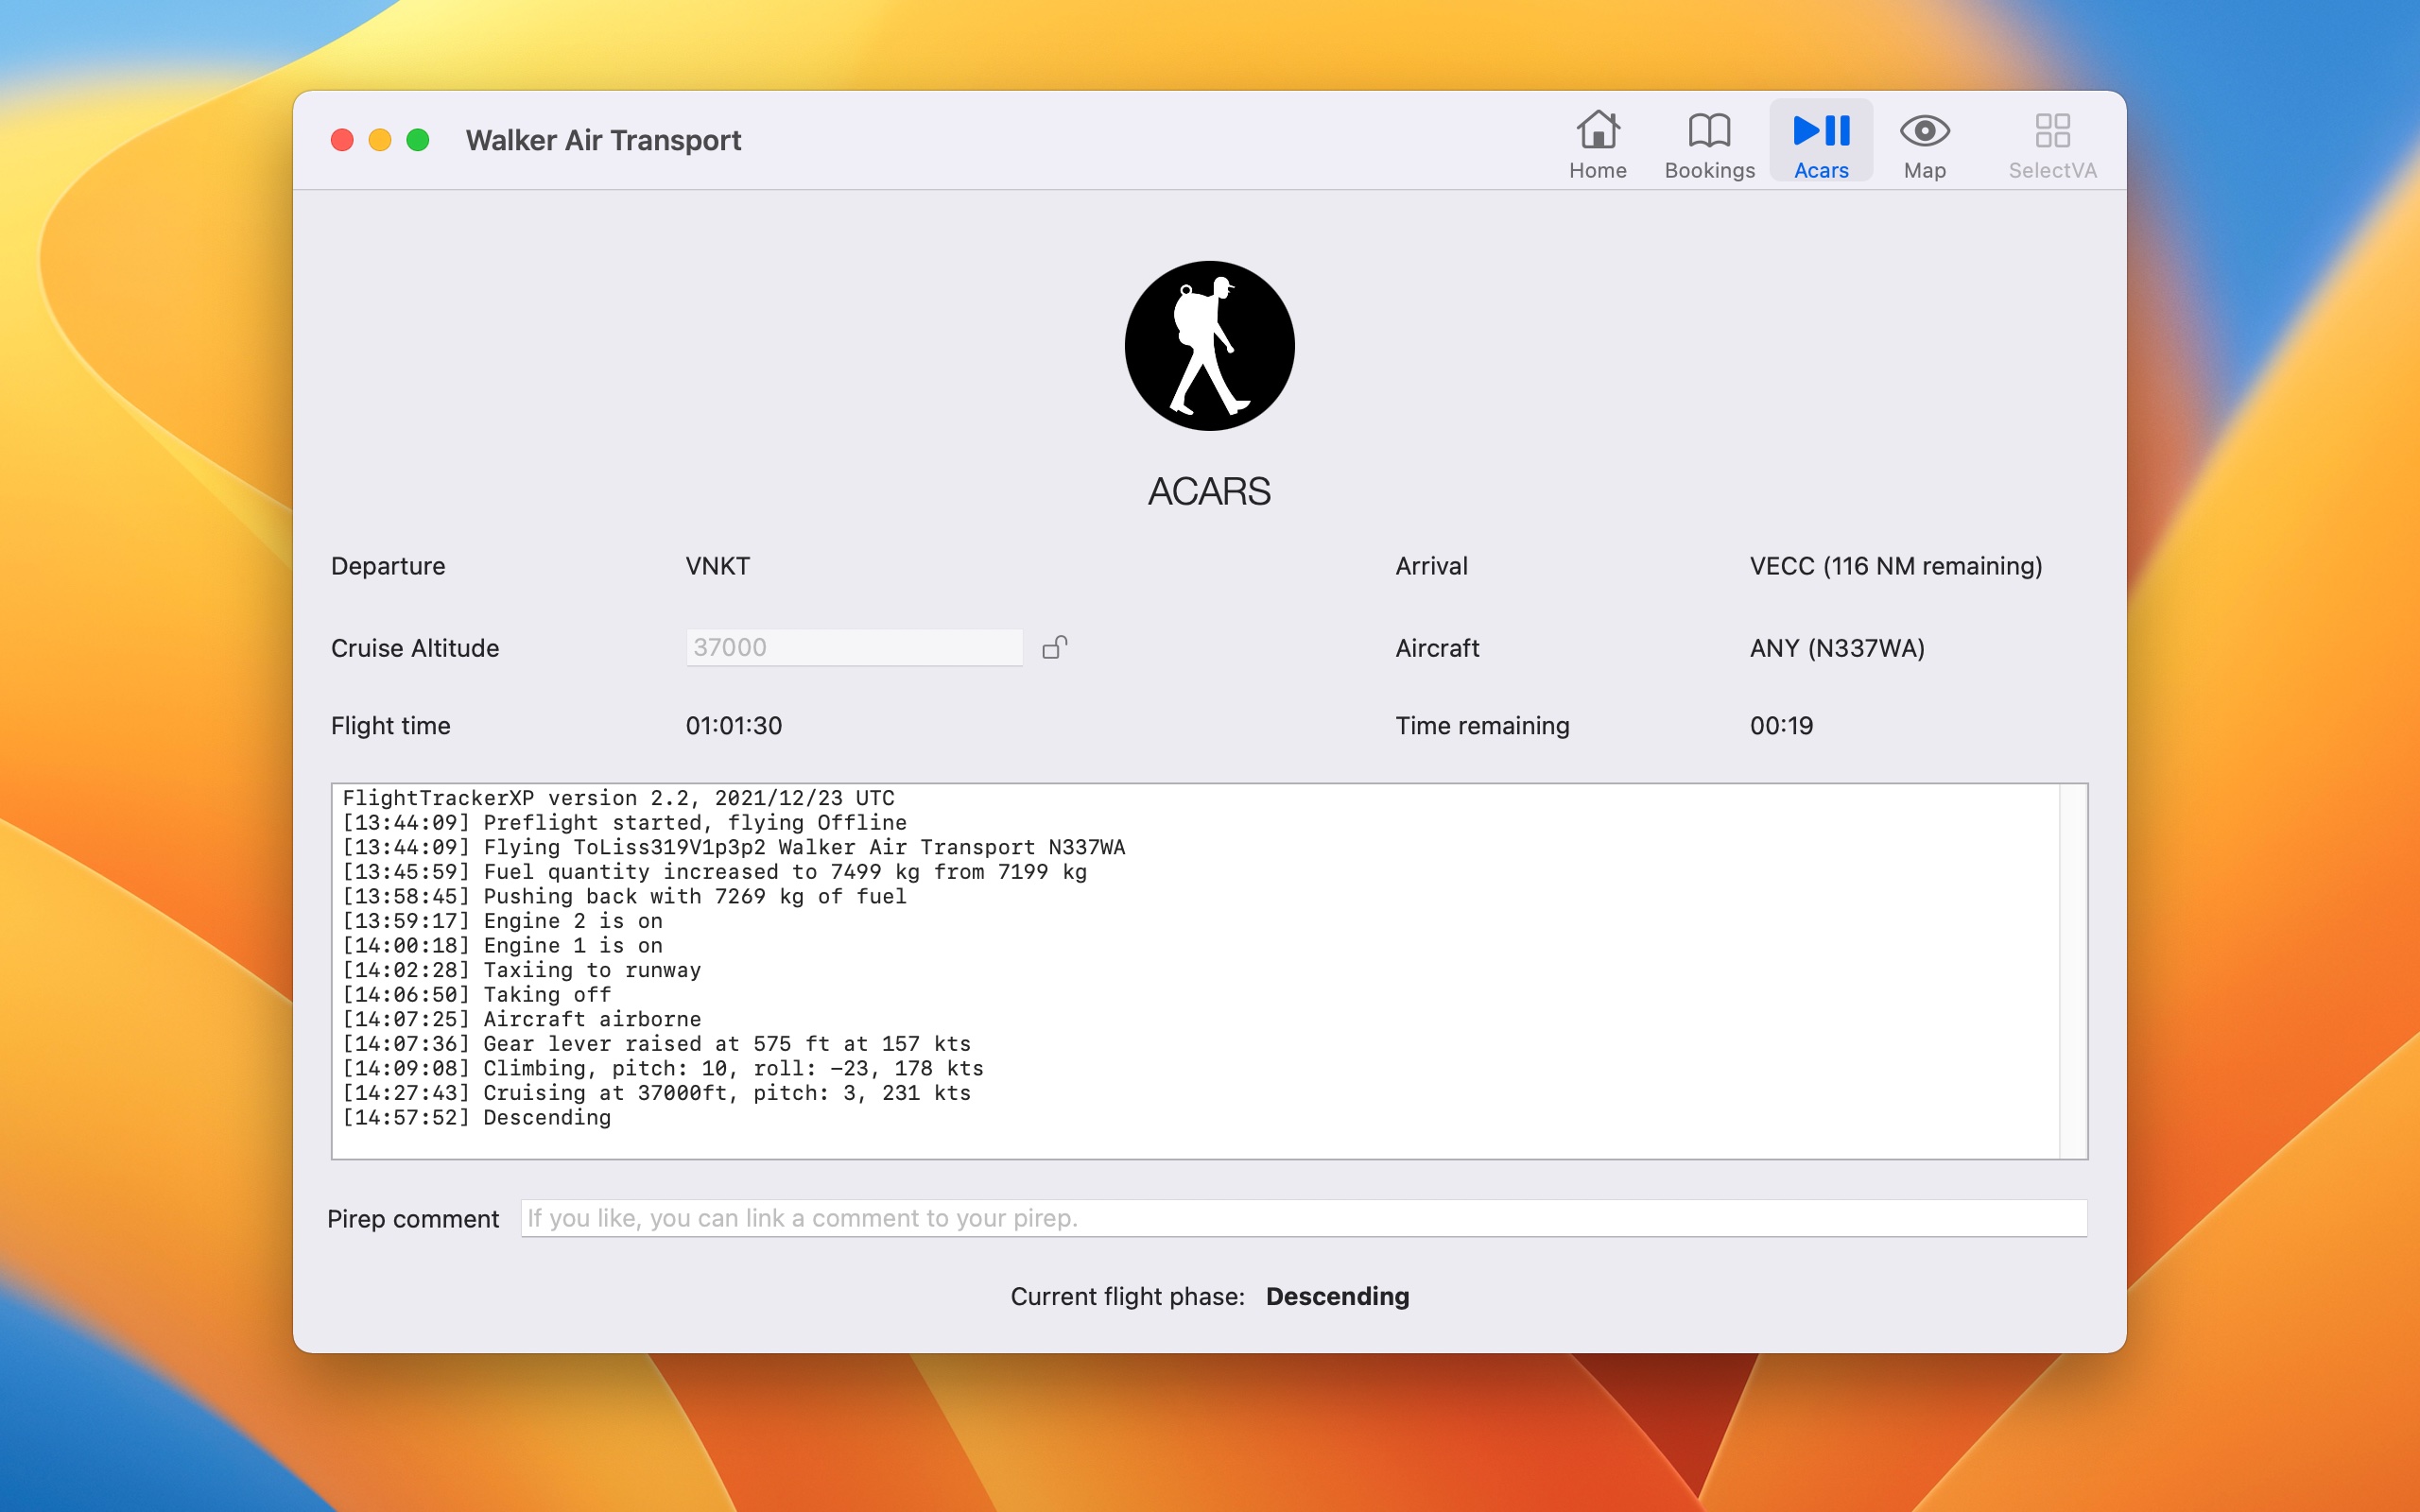
Important note: For the program it is essential that the set cruise altitude is reached during the flight. If necessary, this can also be adjusted in the program during execution. To do that, click on the lock and change the value of the cruise altitude.
If you have provided audio files for the passenger announcement function for this airline, they will be played during the different flight phases automatically.
Finishing
Just like starting a flight, there’s a little checklist when you’re finishing it. If you want to add a comment to your PIREP, you should do this before all conditions for completing your flight have been met.
The flight will automatically finished and the PIREP will be transmitted to your virtual airline as soon as the following conditions in the ‘TaxiingToGate’ flight phase apply:
- All engines are off.
- The parking brake is set.
- X-Plane is running and not in pause mode.

Flight Map
While you are performing your flight, you have the option to view the internal flight map. On it you can see your current position and a red dotted line that shows you the remaining distance to your destination airport.
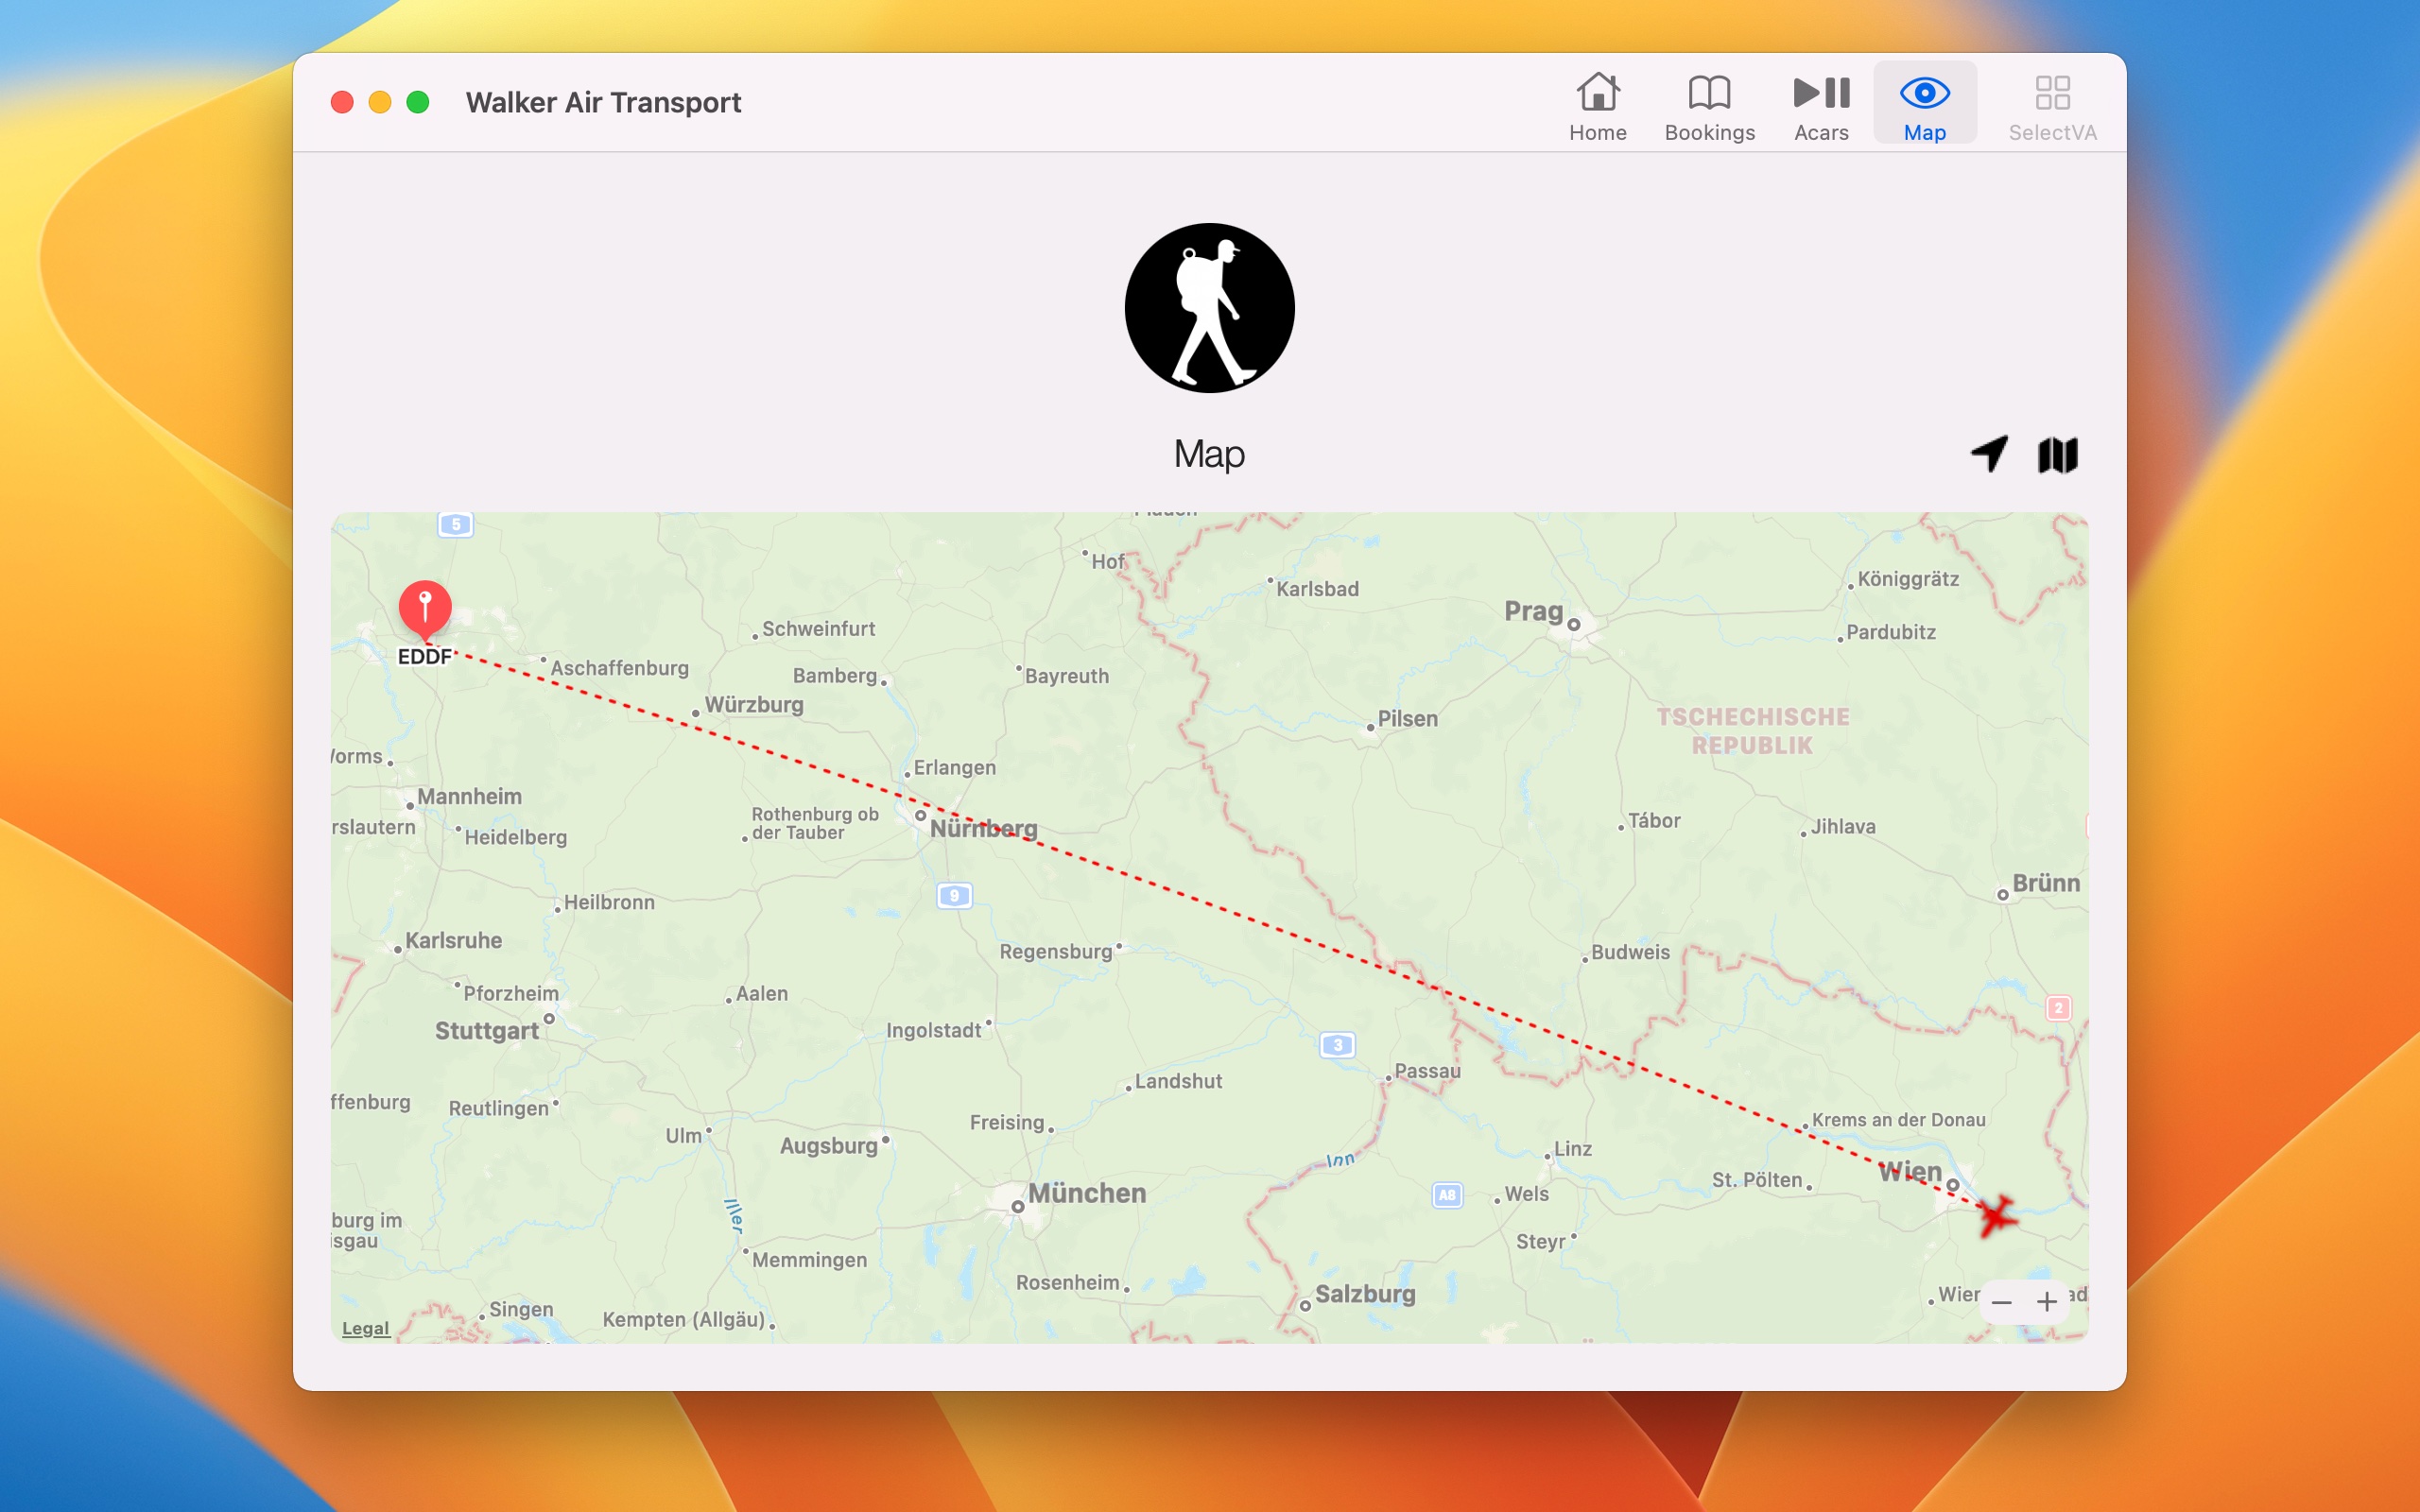
Please note that the remaining flight route is a direct connection without waypoints or fixes to your destination airport.
Debugging
If something does not work as expected, there is the possibility to get additional information. For this you have to open the debugging window. You will find it under the menu item “Window” -> “Debugging”. In case of problems contact the developers and get instructions on the required debug actions.
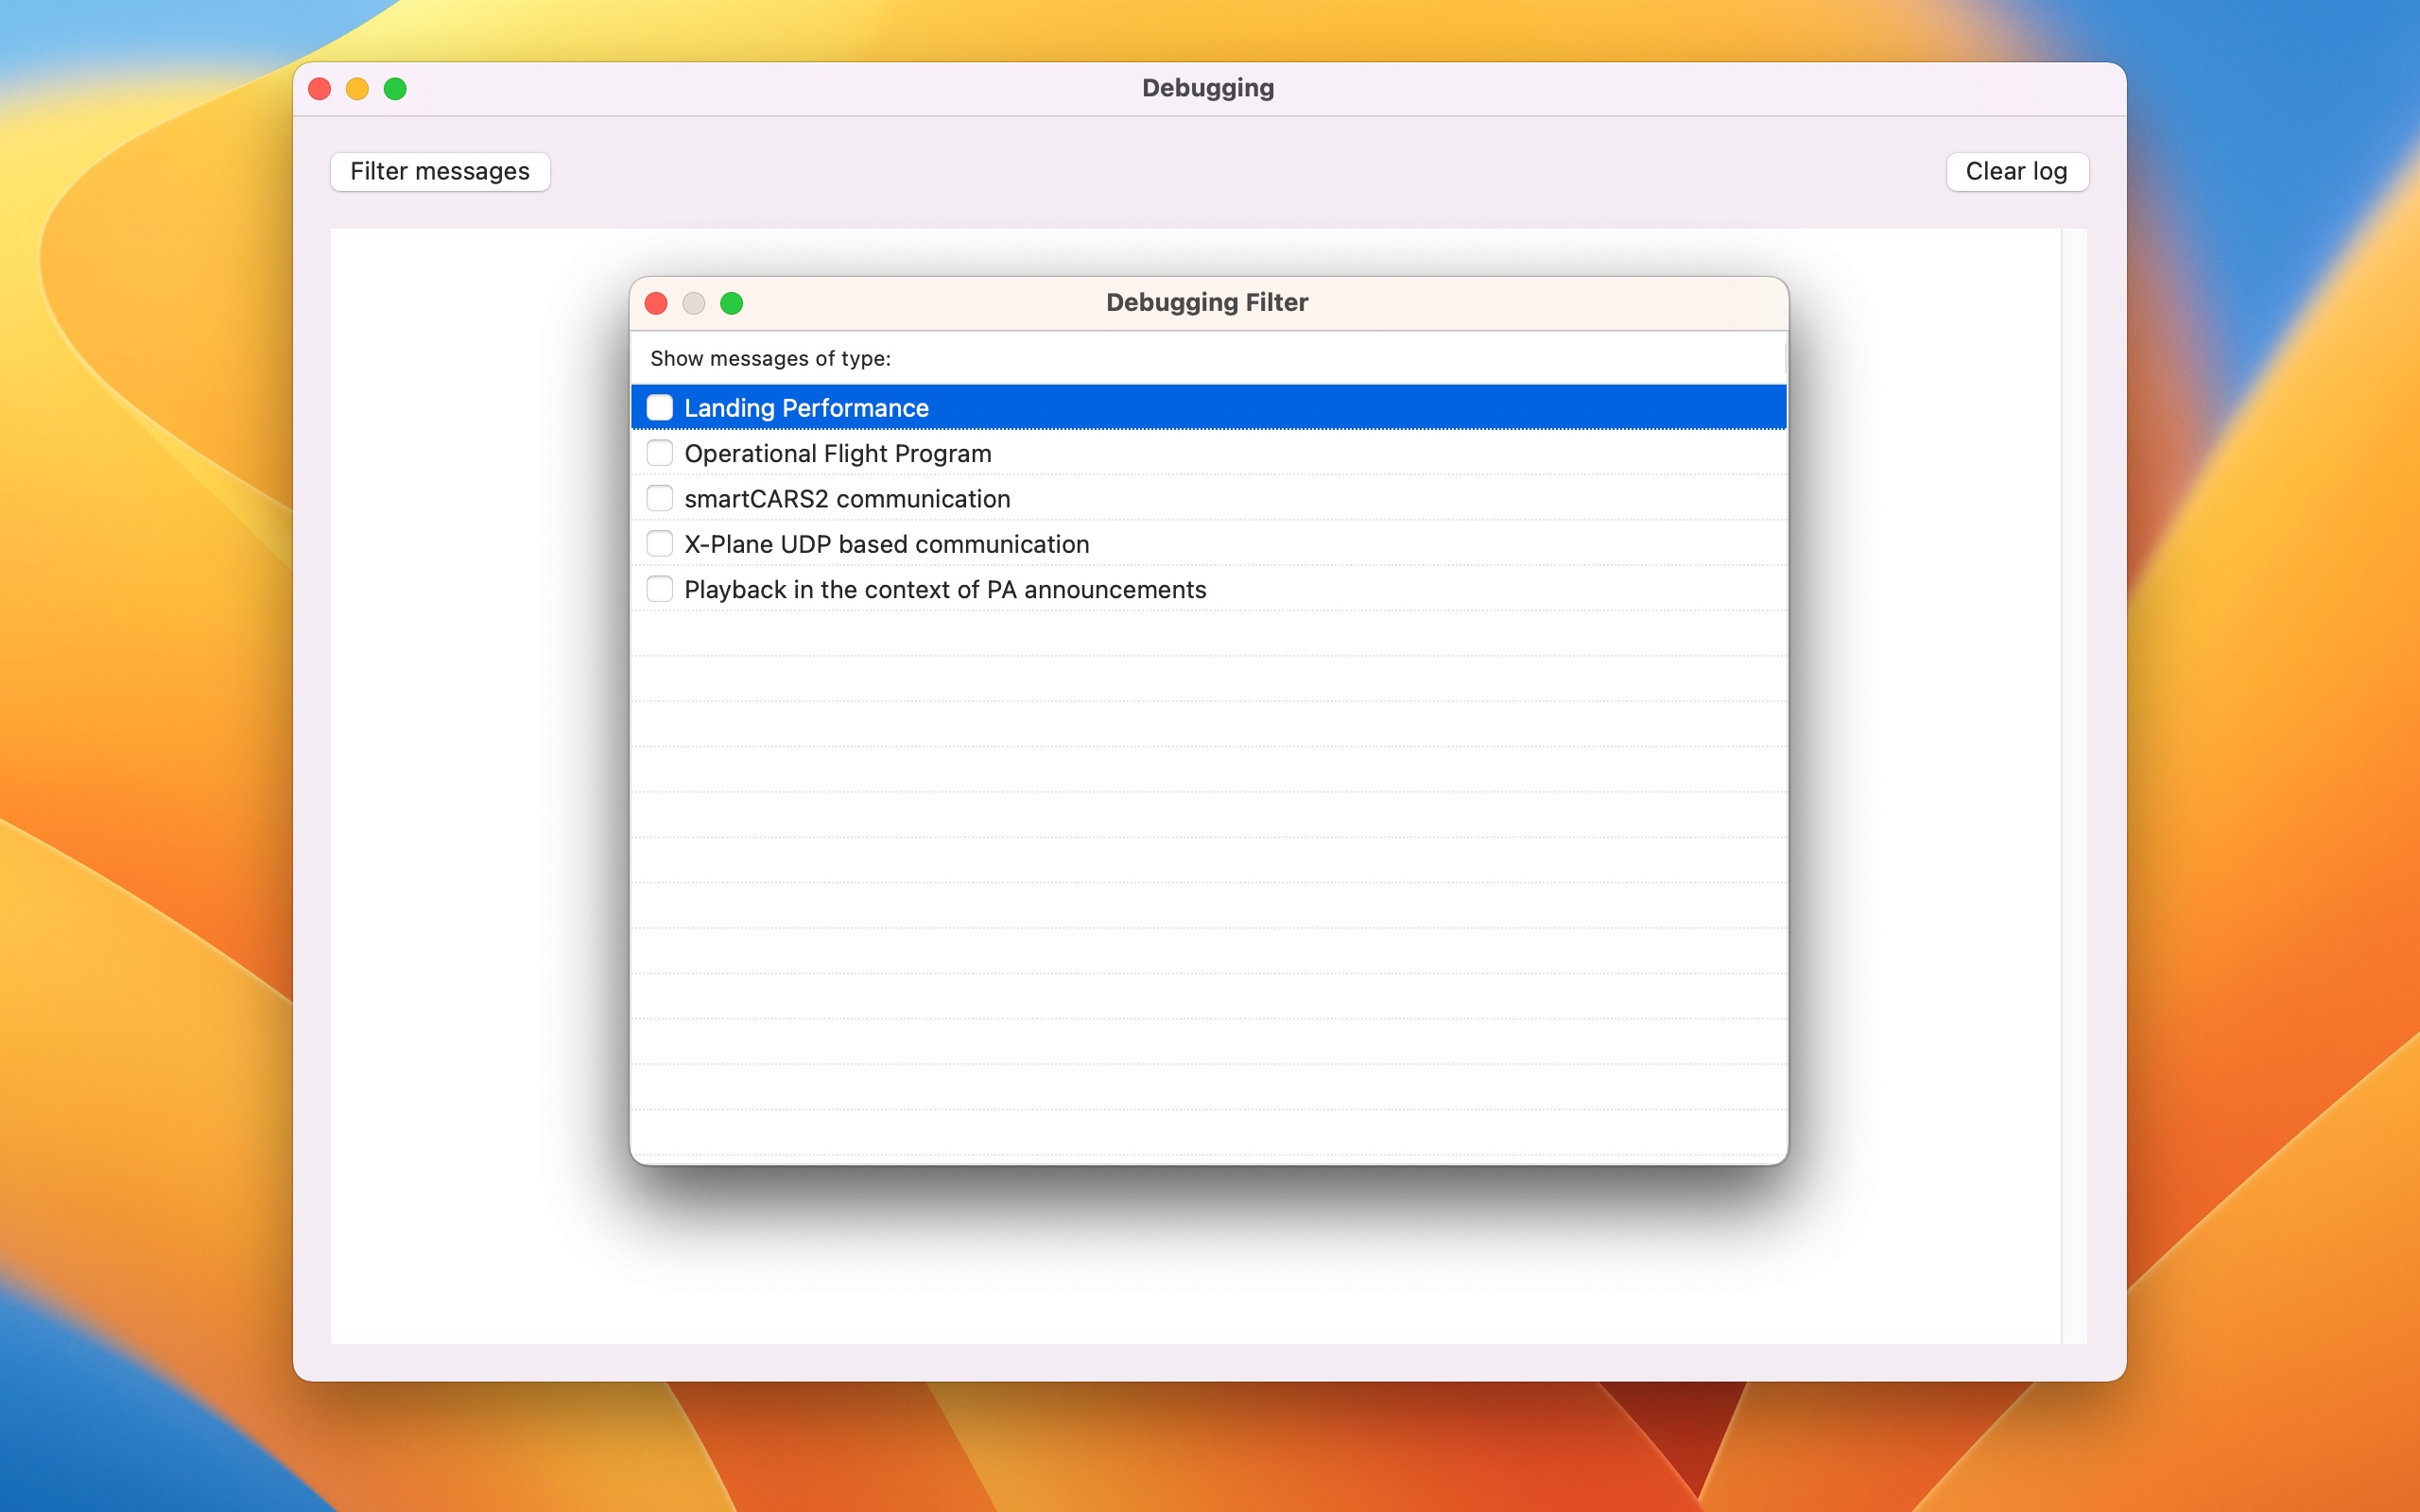
Filter messages
Now you have to select a filter to determine what kind of information you want to get. For performance reasons, activate only the filters you need for your analysis.
Settings
The program was designed in such a way that the standard settings do not have to be changed or adapted by the user. However, if modifications are made, please read the manual in advance or contact the support.
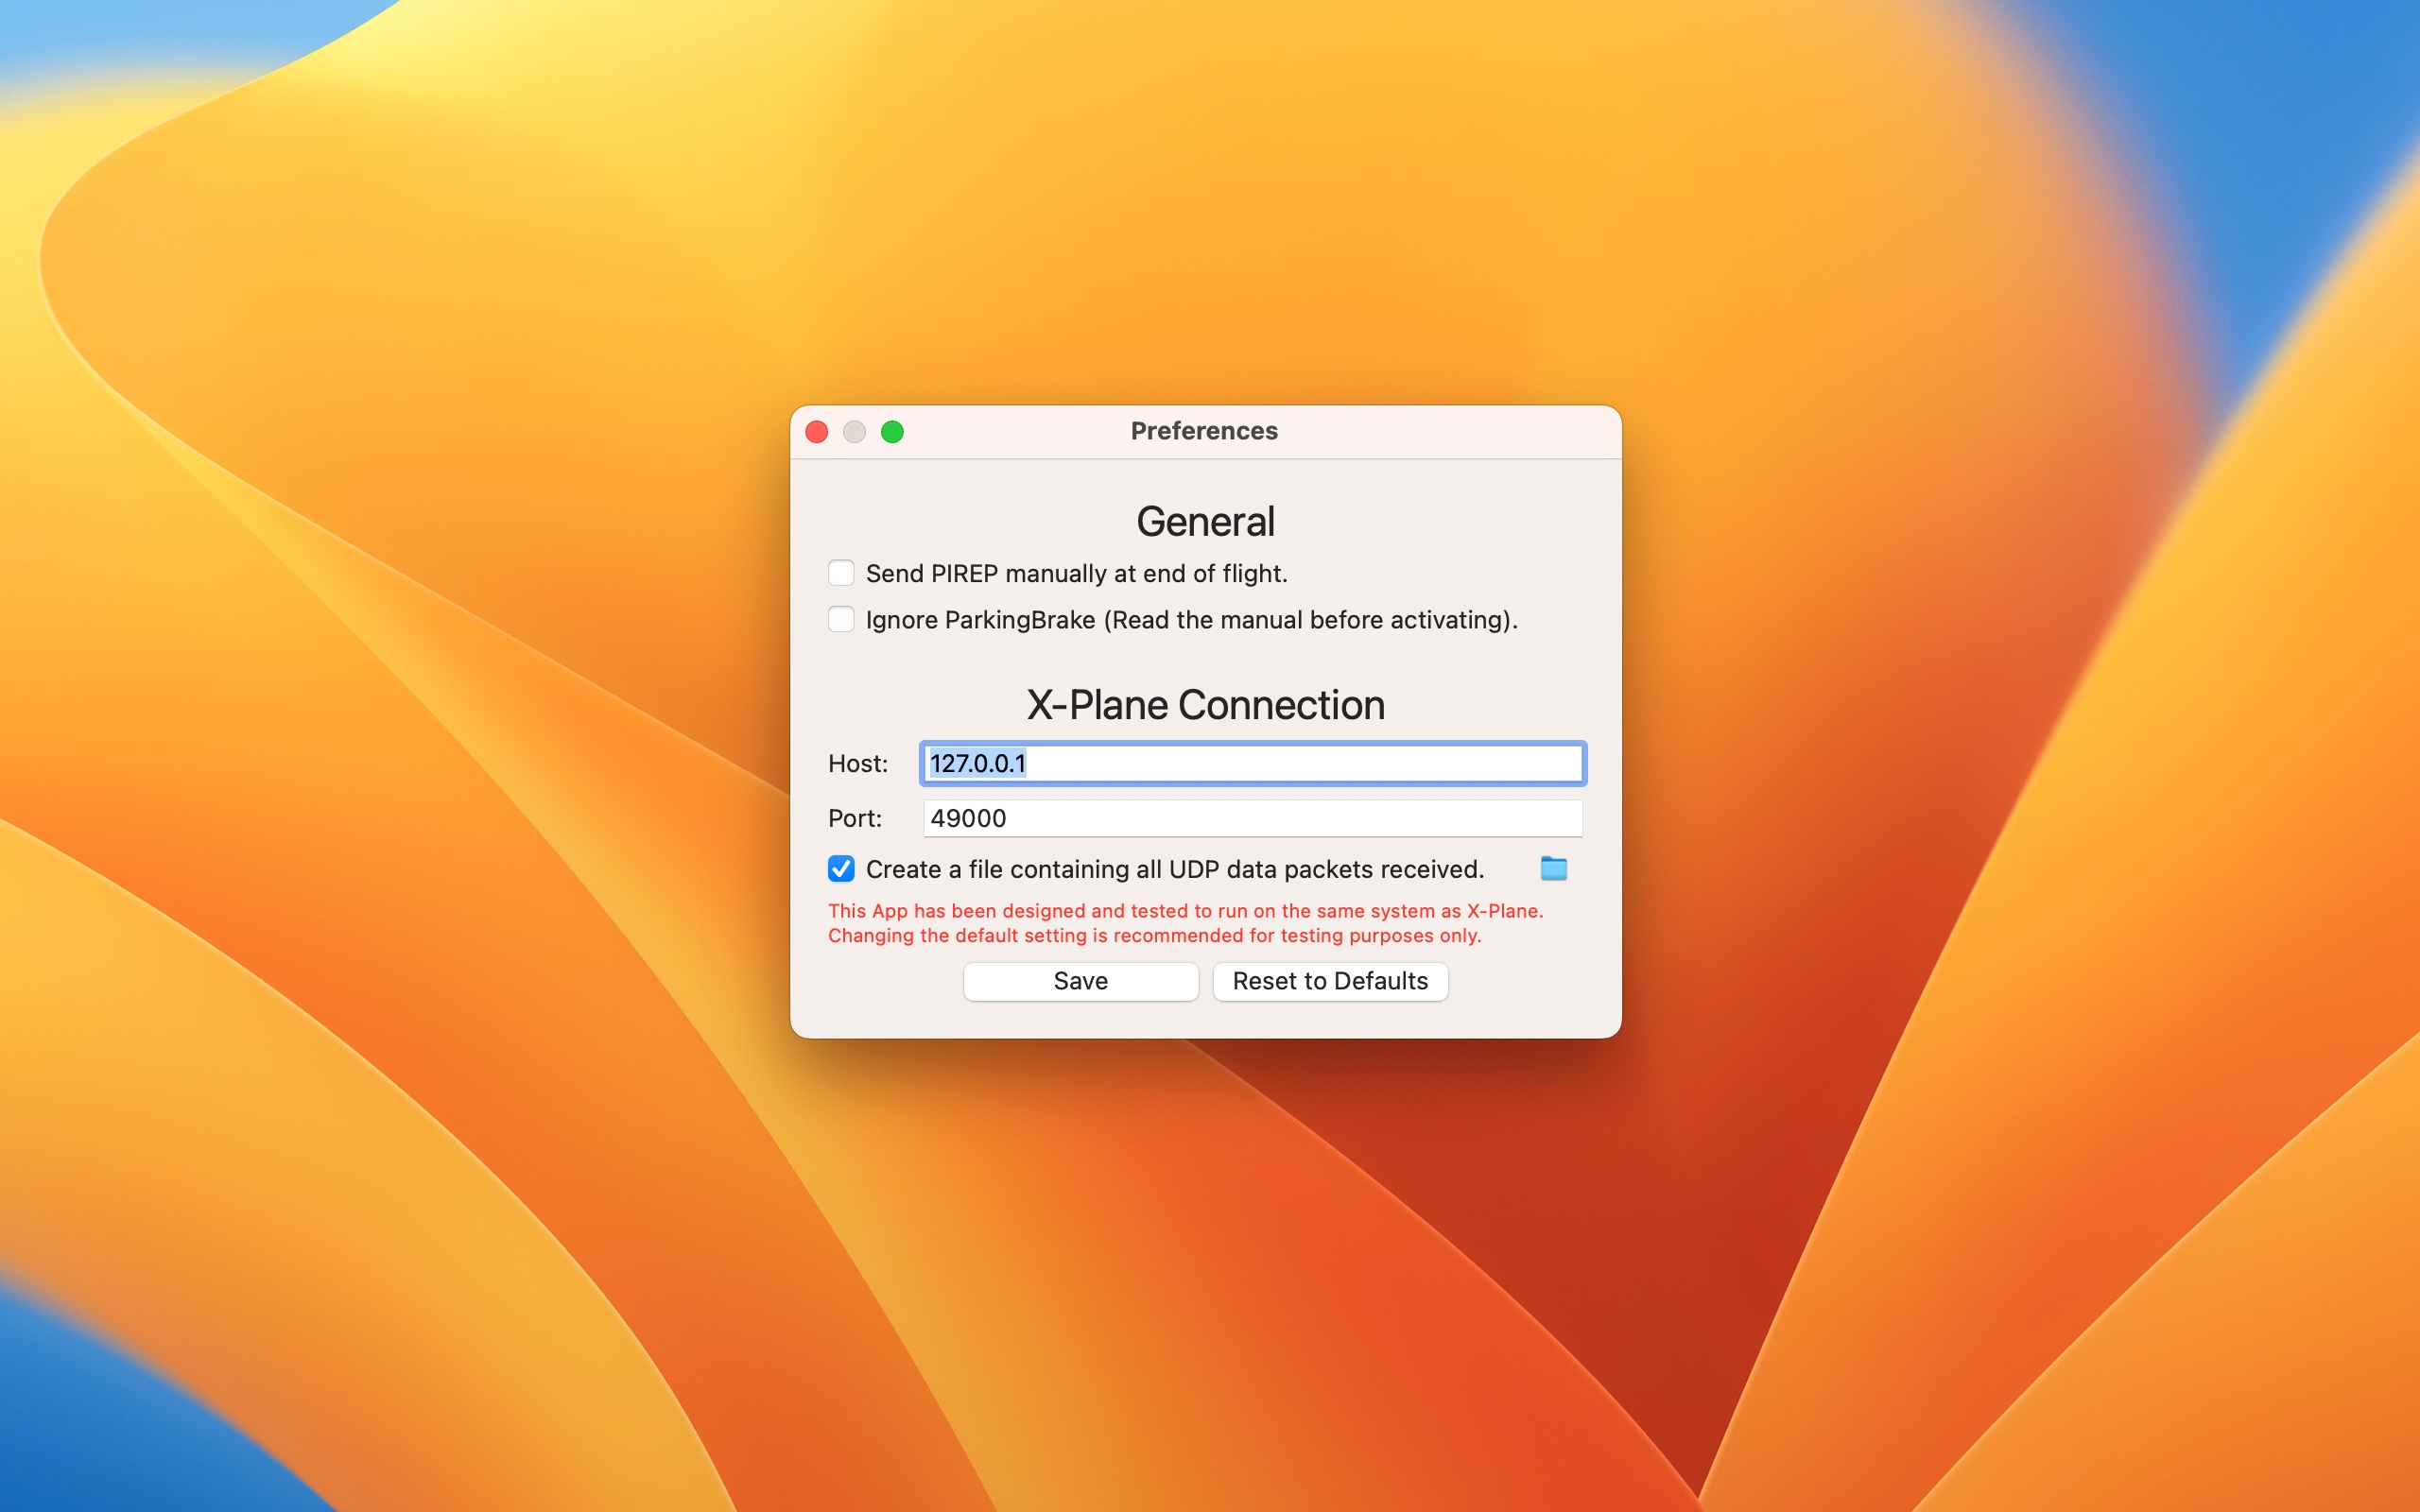
Send PIREP manually at end of flight
If you want to transmit the PIREP automatically at the end of a flight, you can activate this option.
Ignore ParkingBrake
Enable this option only if you know exactly what you are doing or you have received instructions from support to do so. Enabling this option directly affects the tracking function and is only implemented for special aircraft without parking brake or which do not use the standard parking brake dataref.
X-Plane Connection
When changing the host and port parameter, the program can track an X-Plane session over the network. However, please note that this app has been designed and tested to run on the same system as X-Plane itself. Adjusting these parameters is recommended for testing purposes only.
Technical
Differences in the smartCARS protocol
All messages are identical to the offical smartCARS client, except the identifier.
Instead of
smartCARS version ([0-9\.]+), YYYY/MM/DD UTC
the following identifier will be used:
FlightTrackerXP version ([0-9\.]+), YYYY/MM/DD UTC
Disallow your pilots a modification of the aircraft in the client
To disallow your pilots a modification of the aircraft in the client, you can add an additional case action to your frame.php. If you don’t add these rows, your pilots are able to modify the aircraft within the client per default.
case "allowToChangeAircraft":
    // FlightTrackerXP: Simple return TRUE or FALSE to allow a modification of the aircraft in the client.
    echo("FALSE");
    break;
Install the smartCARS Web Scripts
The official smartCARS client was developed by TFDi Design for Windows clients. My FlightTracker can be used for all virtual airlines that have the official smartCARS client in use and therefore have implemented the web scripts. Attached is a link to the installation instructions from TFDi-Design.
No relations to TFDi Design
My client offered here is not related to TFDi Design and has neither the same technical structure nor the same functionality. For compatibility reasons I simply transfer the data in the same way to the virtual airlines.
FAQ
Can my VA use the tracker without using smartCARS from TFDi Design?
Yes, of course. However, the VA needs to extend their backend to run the smartCARS web scripts. At least the following functions must work:
- manuallogin
- positionreport
- filepirep
- getpilotcenterdata
- getbidflights
- getairports
- getaircraft
For further details please read the section “Install the smartCARS Web Scripts” in this manual. If you need help with the setup, just contact me via Discord. I will try to help you.